F&T Quick Start
F&T is a MeshCore-based communication firmware system that supports device-to-device communication, real-time location sharing, target guidance, route tracking, and distance alert functions. This document describes the quick start guide for using the F&T system on the Mesh Node T1 device.
Charging
When using the device for the first time, the battery may be low. It is recommended to charge the device using a 5V USB power supply to ensure proper startup and stable operation.
Power Button Operations
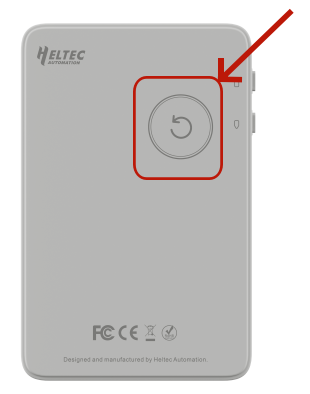
- Power On/Off: Press and hold the power button to turn the device on or off.
- Restart the Device: Press the power button once briefly to restart the device.
- DFU Mode: Double-press the Power Button to enter DFU mode.
After powering on, the device will enter the default interface, which displays the device ID, MSG information, and the PIN required to connect to MeshCore.
Flash F&T Firmware
1.Open the Heltec Device Remote platform: https://devremote.heltec.org/
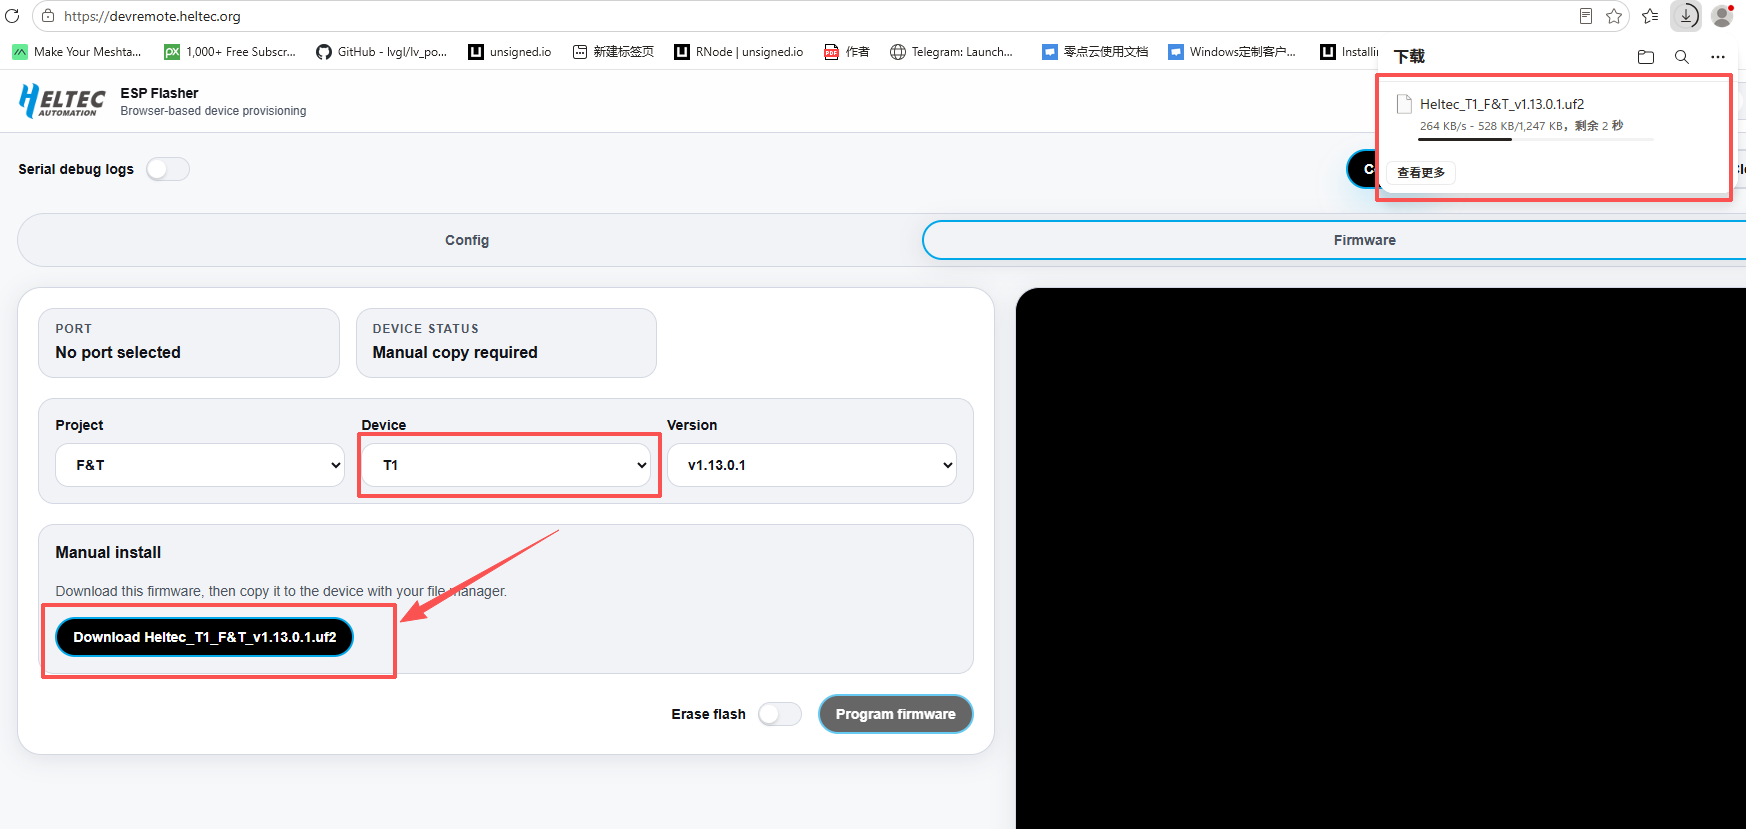
2.Select T1 from the device list, then click Download the T1 F&T firmware.
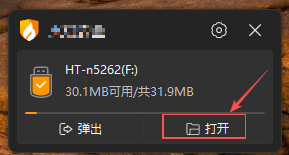
- Connect the device to the computer via a USB cable, then double-press the Power Button to enter DFU mode. Once in DFU mode, the device storage will be recognized by the computer.
- Copy the downloaded the T1 F&T firmware file to the device storage.
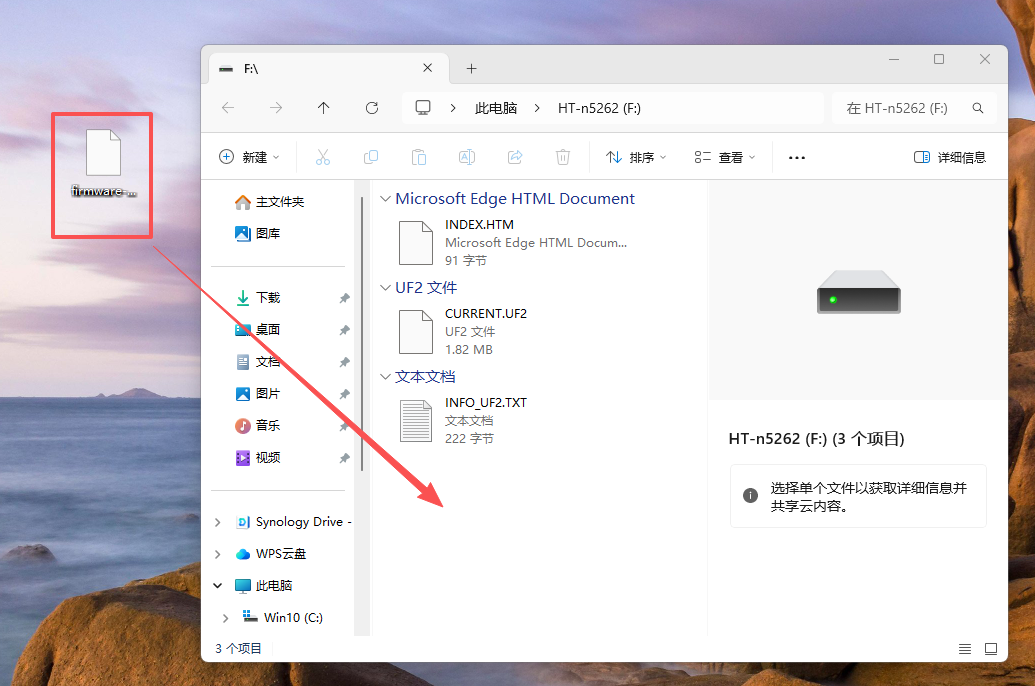
- After the file transfer is completed, the device will automatically restart and complete the firmware flashing process.
After flashing the F&T firmware, the device must be activated through the Device Remote platform before use.
Activate the Device
Please follow the steps below to activate the device:
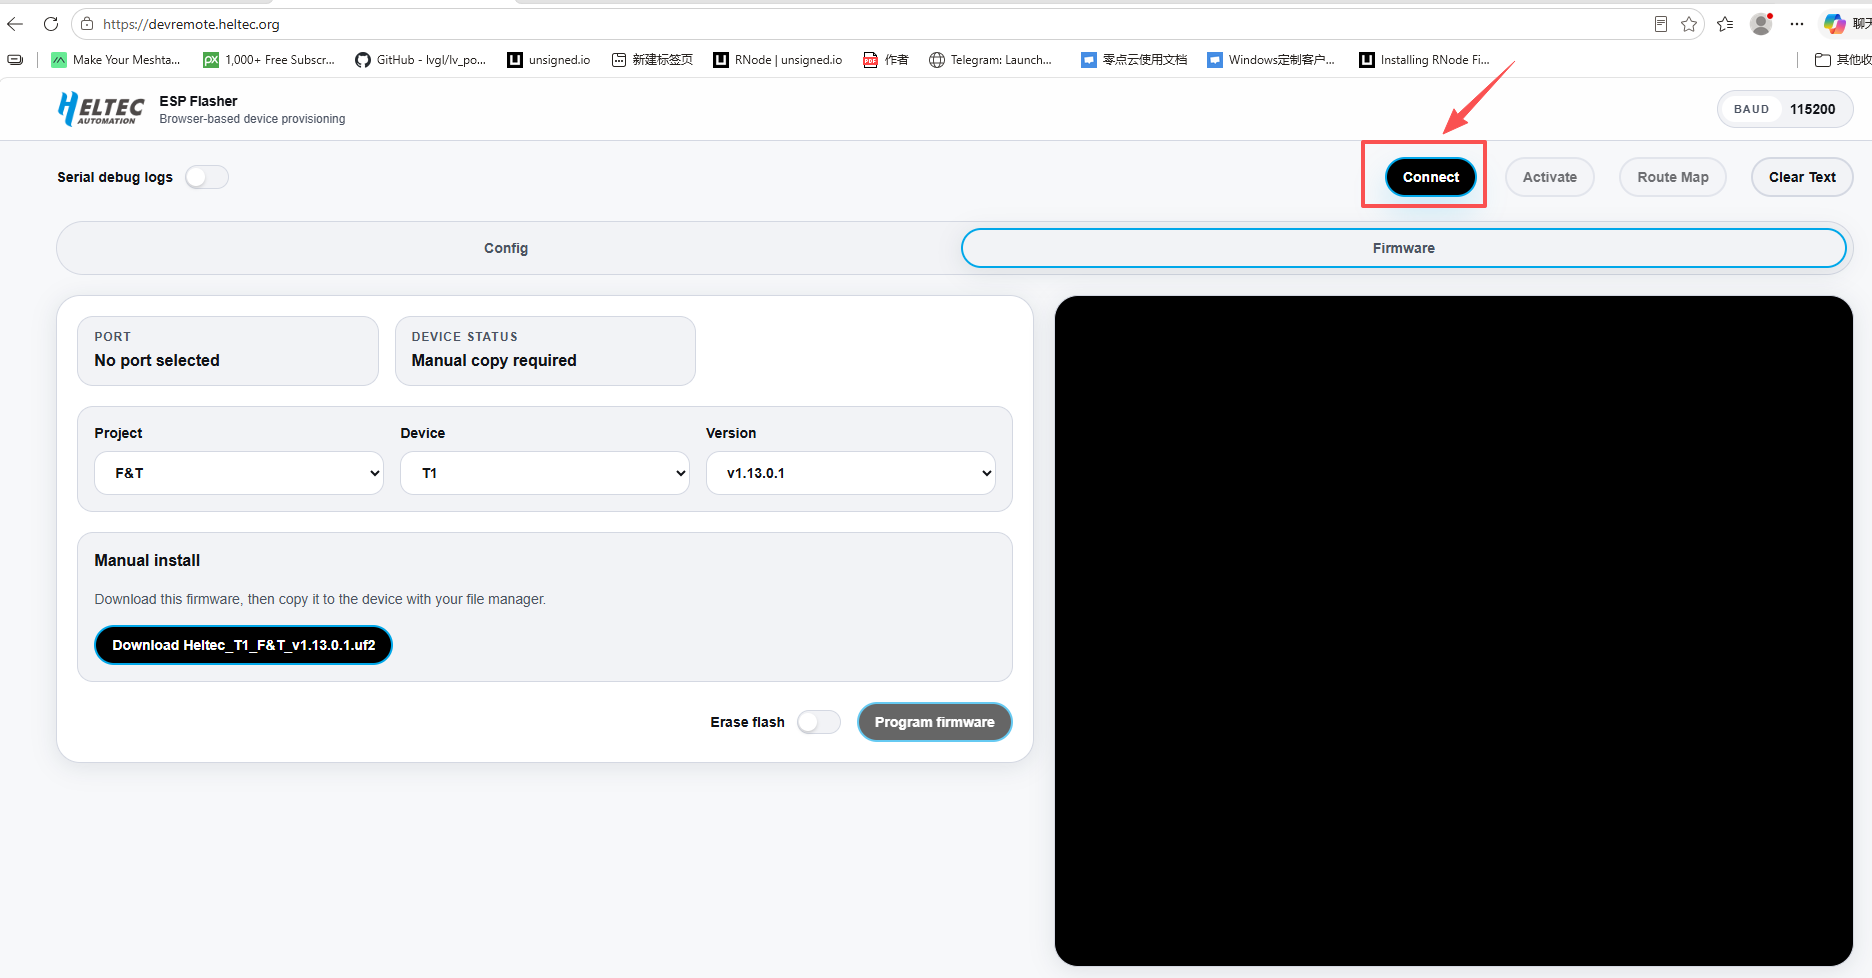
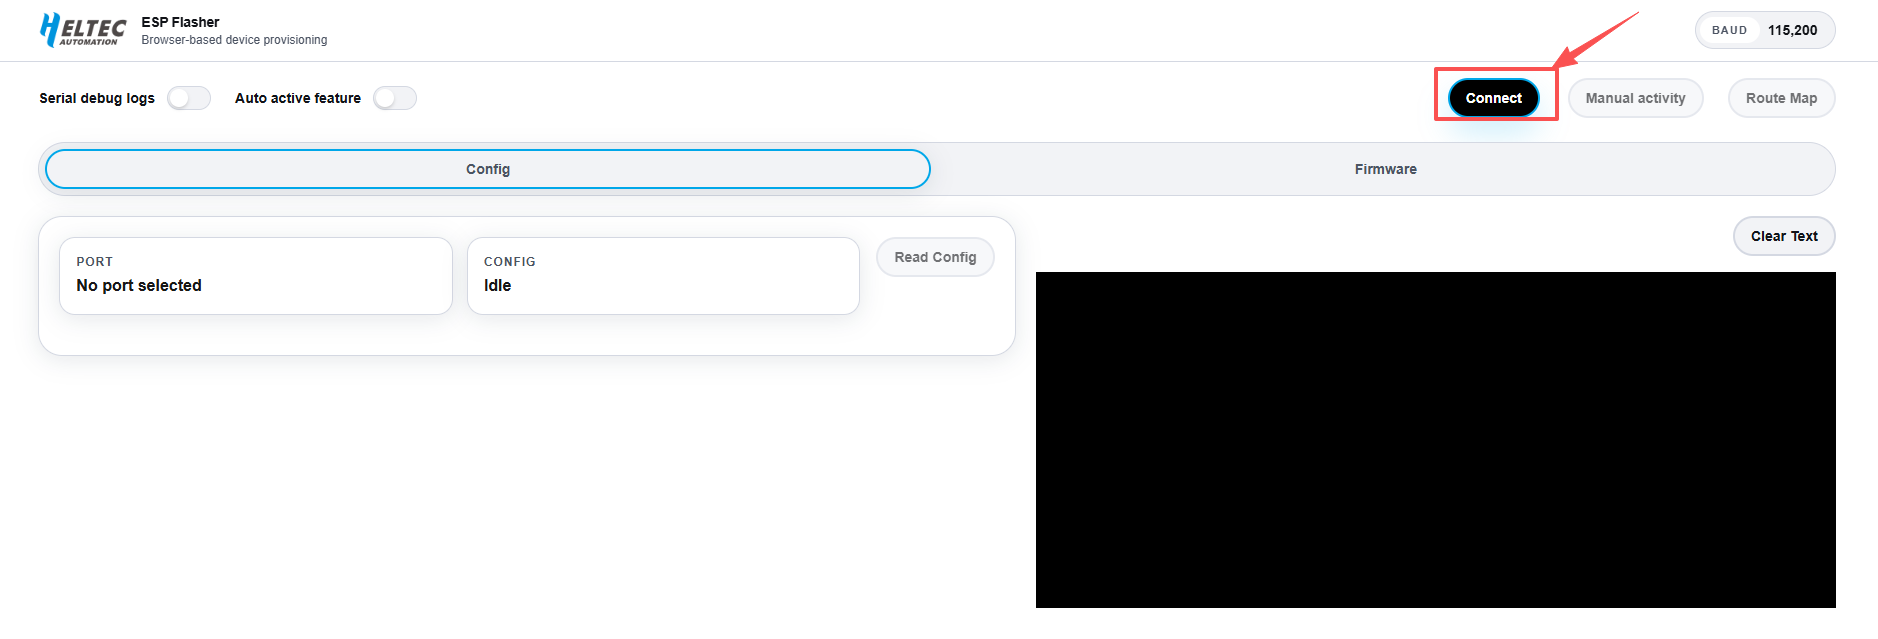
- On the Device Remote page, click Connect.
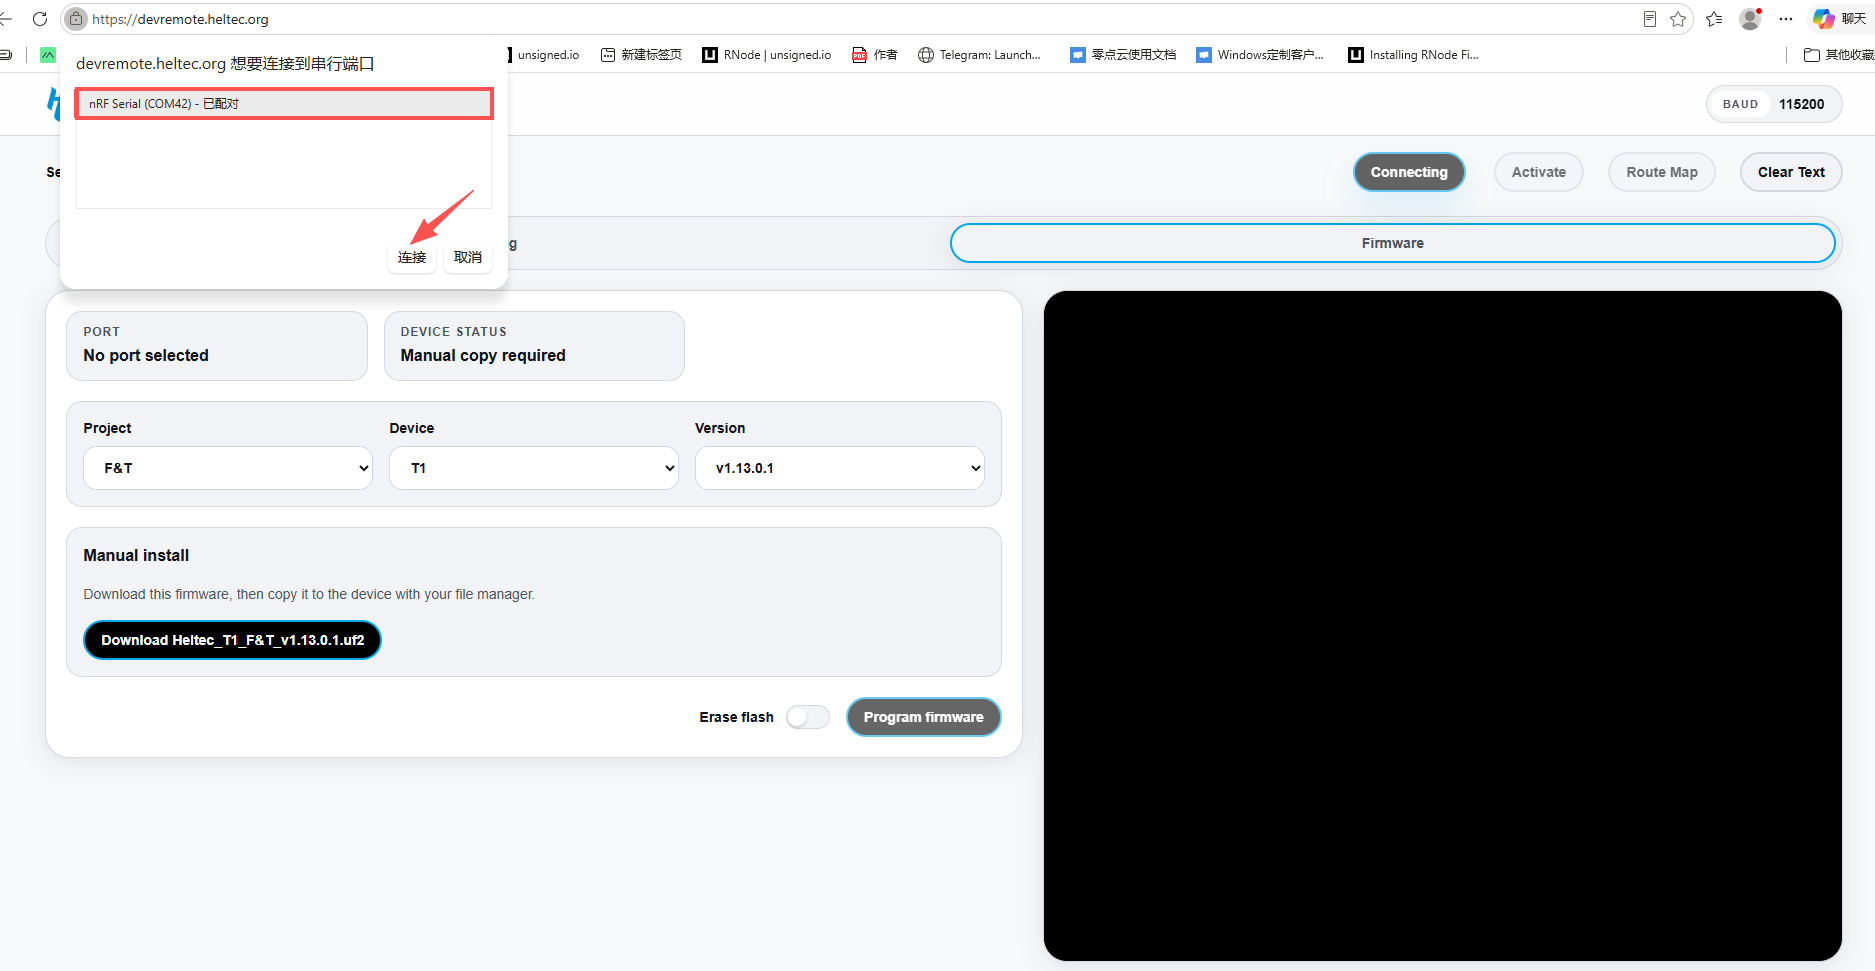
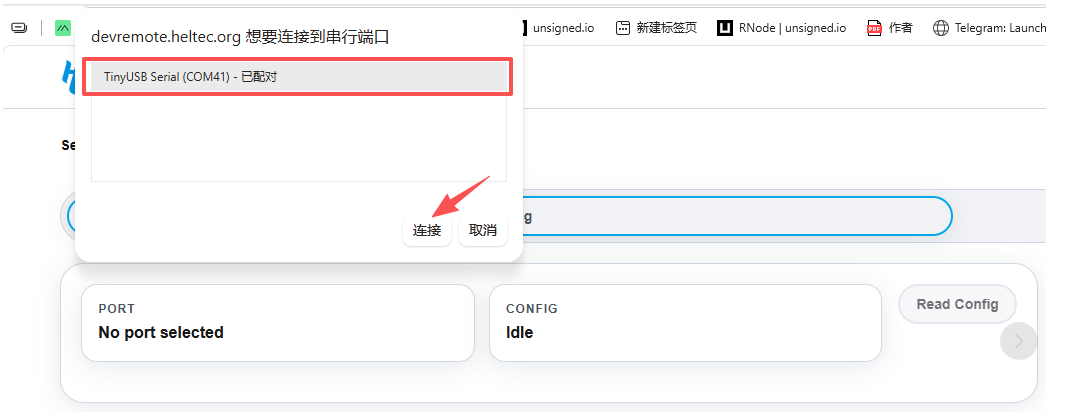
- Select the corresponding serial port and click Connect.
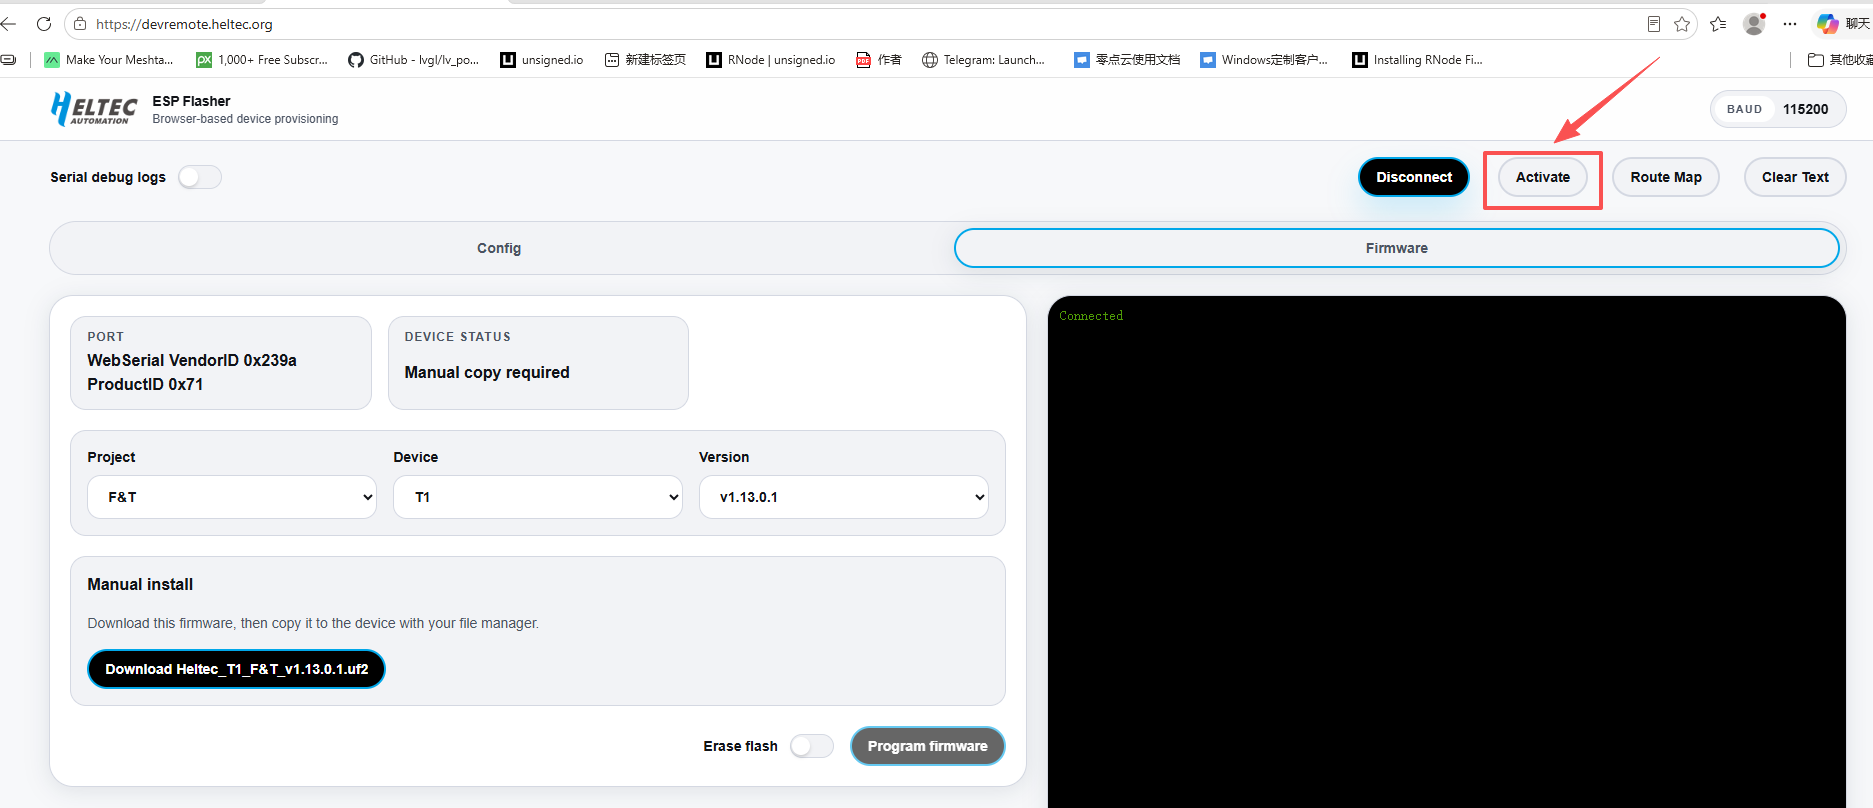
- After the connection is established, click Activate.
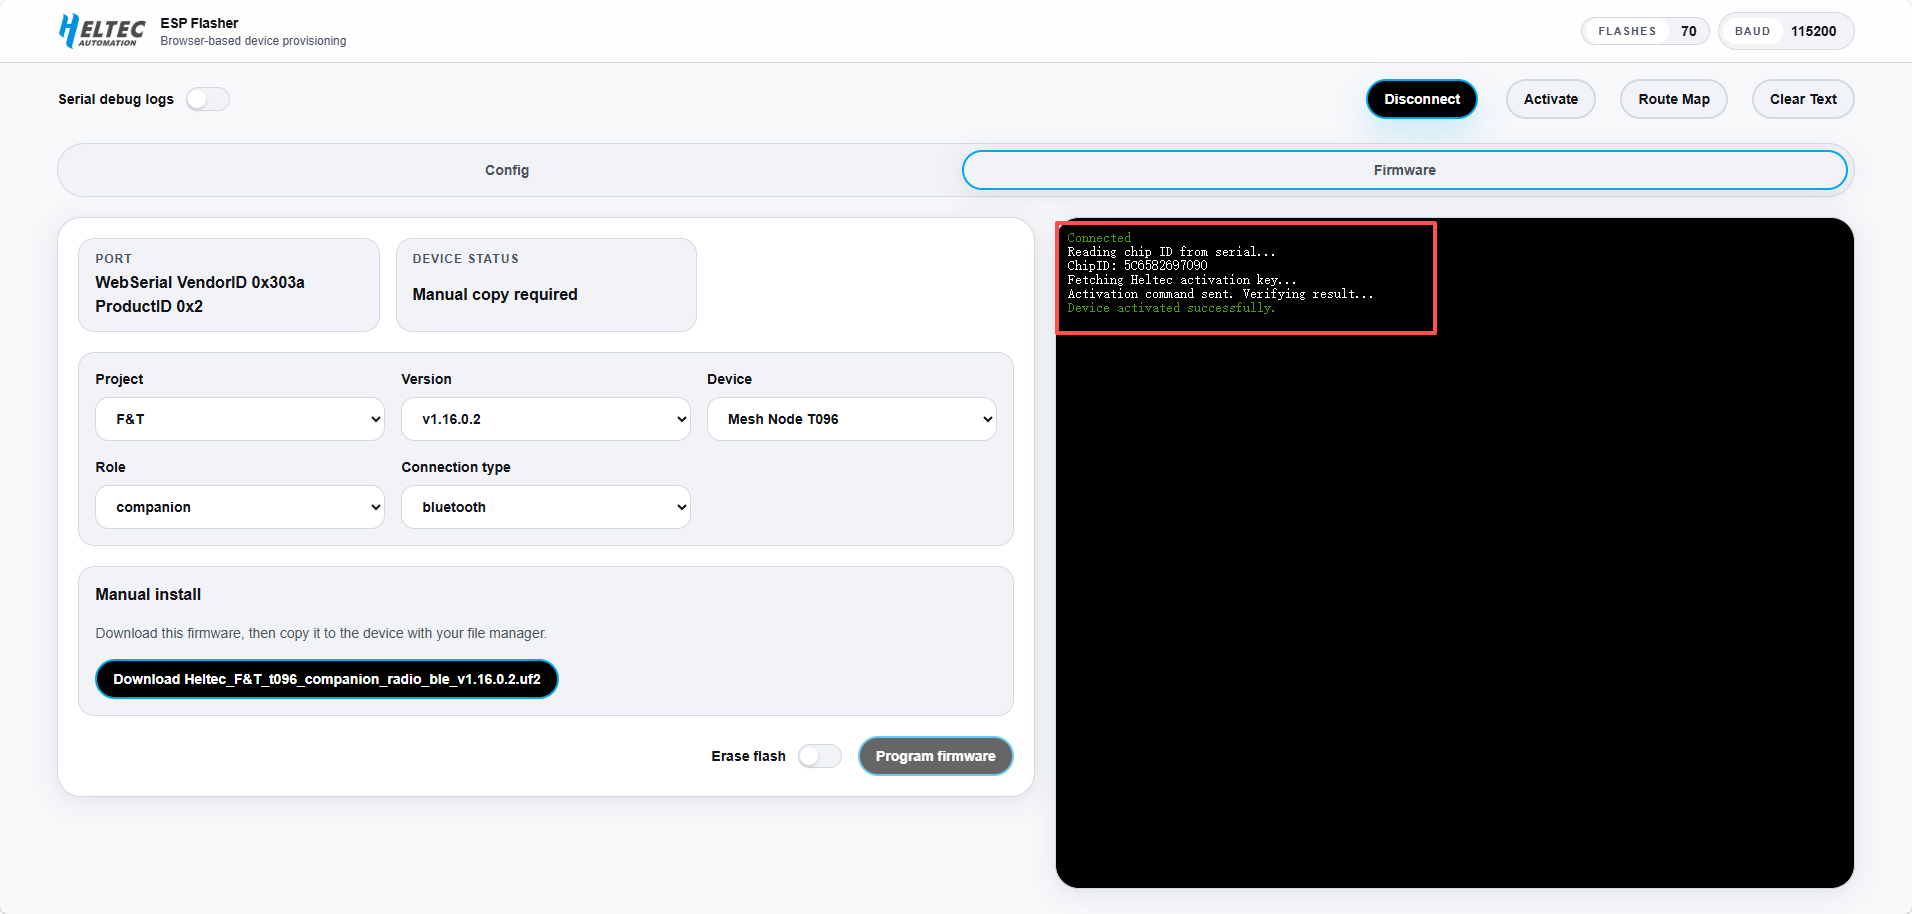
4.The device will be activated automatically. Once activated, the device is ready to use the F&T system.
Function Selection
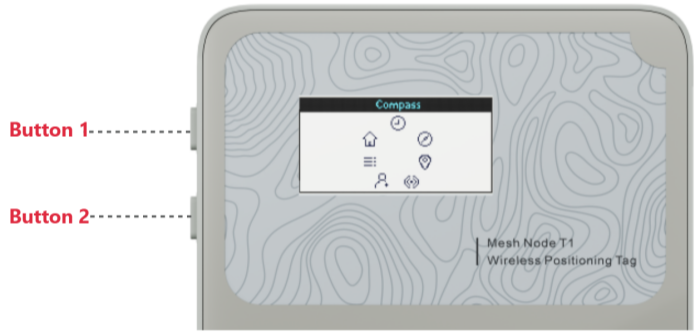
Double-Press either the Button1 or Button2 to enter or exit the function selection menu, which provides access to seven available functions.
- Press the
Button1once to move the selection to the left. - Press the
Button2once to move the selection to the right. - After selecting the desired function,
press and holdthe Button1/2 to confirm and enter the corresponding function screen. Double-pressthe Button1/2 to return to the previous menu.
| Function | Description |
|---|---|
| Home | Return to the main screen and view basic device information |
| Recent | View recent messages |
| Radio | Access radio communication functions |
| Compass | Display the current compass heading and orientation information |
| Find Friend | Locate a target device and provide direction guidance |
| GPS | View current GPS positioning information |
| System | Device System Settings |
System Setup
- Press the
Button1once to move the selection up.- Press the
Button2once to move the selection down.- Press and hold the button to confirm the selected option.
When using the device for the first time, please complete the following basic settings:
1.Enter the system settings interface
2.Configure the LoRa Region
3.Set the screen sleep timeout duration
4.Verify Bluetooth and GPS status (enabled by default to support positioning and connectivity functions)
Target Search
The target search feature in F&T is divided into two modes:
Friend Search Mode
1.In System Settings: Click Find Mode --> Friend --> Friend --> target device
2.After selecting the target device, double-click Button2 to enter the Find Friend interface.
3.The system will then display the real-time direction, distance, and ID of the target device.
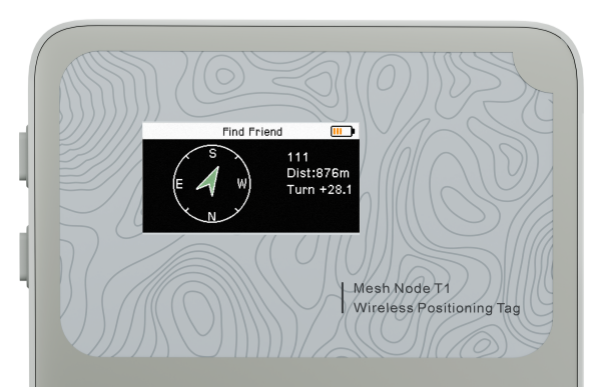
Camp Mode
1.In System Settings: Click Find Mode --> Friend --> Waypoint --> Use current GPS/Enter lat,lon
- Select Use Current GPS : mark current location as camp
- select Enter Lat/Lon : manually input camp coordinates
2.After confirming the camp location, double-click Button2 to enter the Find Friend interface.
3.The system will then display the real-time direction and distance to the camp.
The target device needs to enable Location Share in System Settings.
If disabled, the MeshCore system will fall back to periodic location broadcasting with a fixed interval. This may reduce real-time accuracy and responsiveness. Enabling Location Sharing is recommended for better real-time performance.
Track Recording
1.Enable the GPS Track feature in the system settings.
2.Connect the device to a computer via a USB cable.
3.Open the DevRemote tool.
4.Click the Connect button.
5.Select the paired serial port.
6.Click Route Map, and the system will automatically detect the number of recorded track points stored on the device.
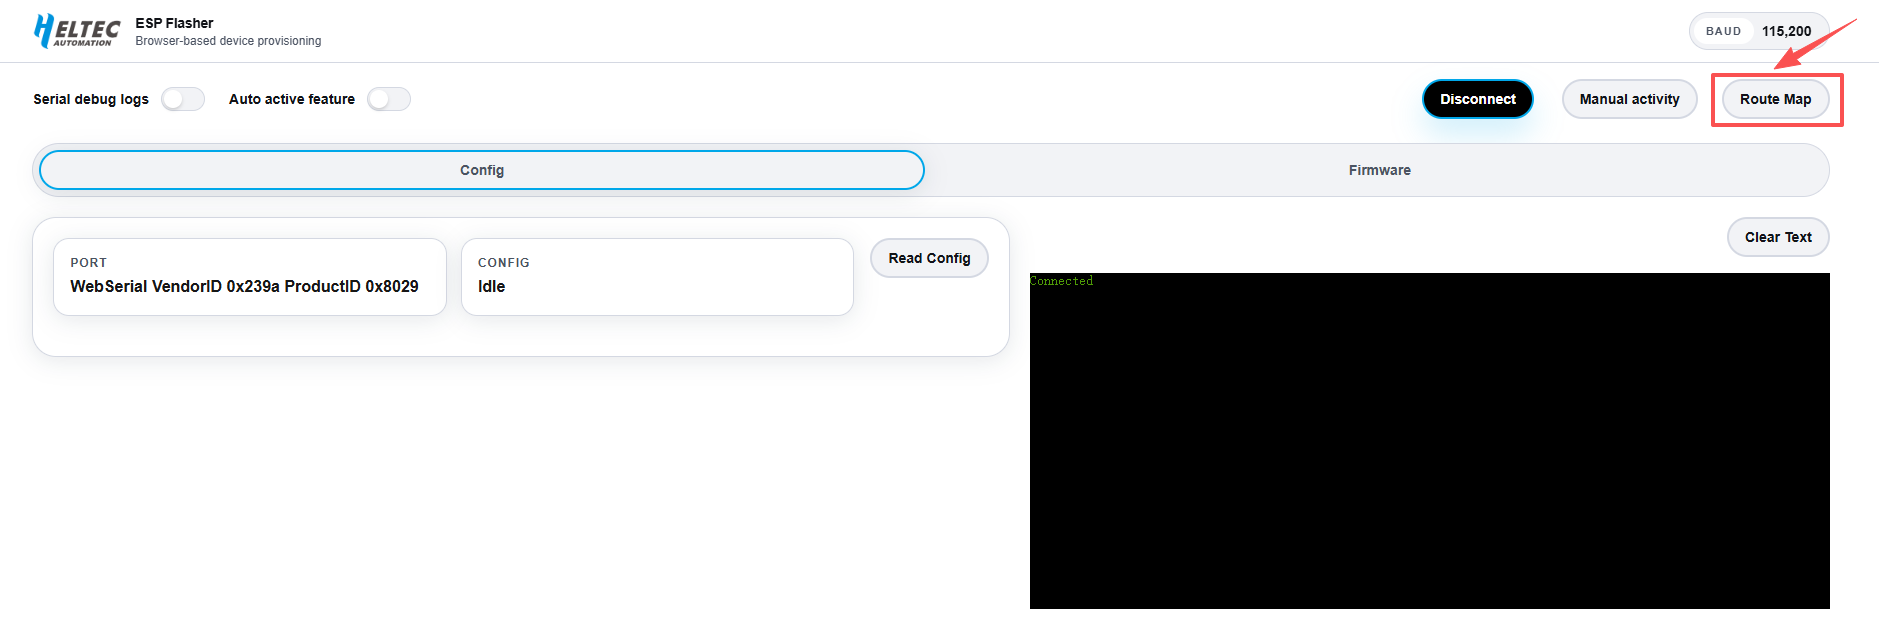
Current logging rule: one point is recorded approximately every 50 meters of movement, Up to 600 track points can be stored.
Quick Access Menu
The Quick Access Menu provides shortcuts to commonly used functions and includes two function pages:
- QuickPing
- Compass
Press and hold Button1 or Button2 to enter the Quick Access Menu. The QuickPing page is displayed by default.
QuickPing
The QuickPing page includes two functions: Send Message and Send Advert.
Send Message
Operation Steps: Press and hold Button1 or Button2 to enter the function selection menu.--> Briefly press Button1 or Button2 to select Send Message.--> Press and hold BUTTON1 or BUTTON2 to enter the message sending page.
When sending a message, three sending modes are available:
- Broadcast: Sends a message to all available devices in the network.
- Group: Sends a message to a specific group. Users can select an existing group.
- Personal: Sends a message to a specific device for point-to-point communication.
After selecting the target, press and hold Button1 or Button2 to enter the message sending interface. The device supports preset messages (such as Hi and Bye) and custom messages entered through the built-in keyboard.
Send Advert
Send Advert allows the device to broadcast its information to the mesh network, enabling other devices to discover or update device information, such as Device ID and Device Name.
Compass
The Compass page is used to calibrate the device's 9-axis sensor.
Operation steps: Enter the Compass page. --> Press and hold BUTTON1 or BUTTON2 to start calibration. --> Follow the on-screen instructions, such as “Move in figure-8 ”, to complete the 9-axis sensor calibration.