HC32 Get started
The operation of HC33 is essentially the same as HC32. The only difference is that when selecting the board in Arduino, the HC33 board should be chosen.
Required Hardware
- ESP-HaLowCamera
- USB Type-C cable
- Computer running Windows, Linux, or macOS
Be sure to use an appropriate USB cable. Some cables are for charging only and do not provide the needed data lines nor work for programming the boards.
Hardware Connection
The installation direction of SD card and camera is shown below.

Required Software
- Arduino IDE
- Git (GitHub installation required)
Installing the development framework
Heltec provides an Arduino-based development framework that includes basic ESP32 code and sample Wi-Fi HaLow code.
For installation, please refer to this link:
Heltec ESP_HaLow Development Framework Installation Guide
If you have already downloaded the ESP_HaLow library, we recommend updating to the latest version.
Programming
Once you have the framework and libraries installed, connect your computer to the board and start programming nodes.
Example
1.Connect your node to the computer with a USB cable. 2.Open Arduino IDE -> Tools, correctly select the board.

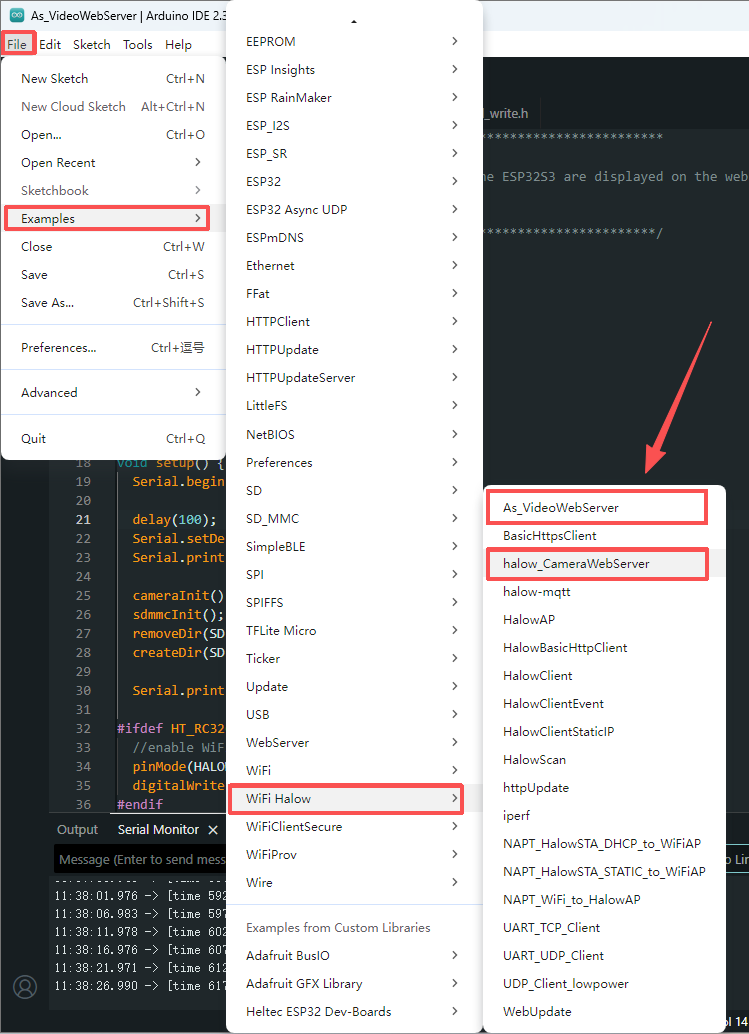
3.Select File -> Example to find the example you want. The location of the Wi-Fi HaLow related code is circled in the figure below.

4.Adapt your code to your needs.
5.Compile & Upload.
Viewing the Camera Web Server
1.To view the live video stream from the HC32 camera, a HaLow AP device is required. The Dongle or HT-H7608 is recommended.
Although the HC32 supports AP mode, it does not support bridging, so the camera's video stream and photos cannot be accessed directly through the HC32's own AP.
2.Open the camera example code.
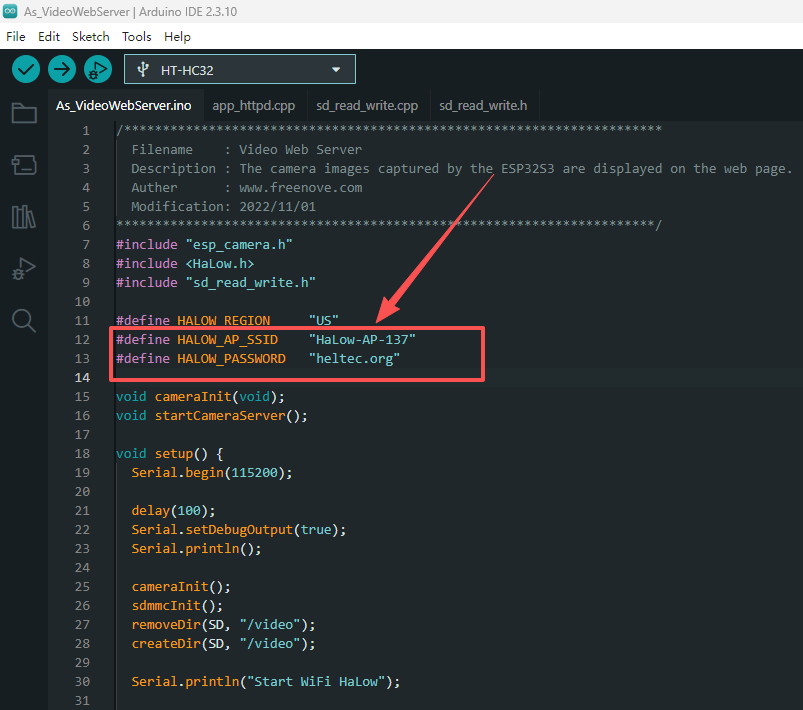
3.Update SSID and PASSWORD with the Wi-Fi network name and password of the target HaLow AP. This allows you to access the HC32 camera’s live video stream and captured photos through the AP.