- Upload Firmware
- WirelessBoot Framework Installation
Upload Firmware via WirelessBoot
Enter WirelessBoot
-
**Different devices have different methods for entering WirelessBoot. Here, the HRI-3621 is used as an example.**Press and hold the device button until the blue light stays on. Continue holding without releasing until the purple light turns on. At this point, release the button, and the device will enter WirelessBoot mode.
-
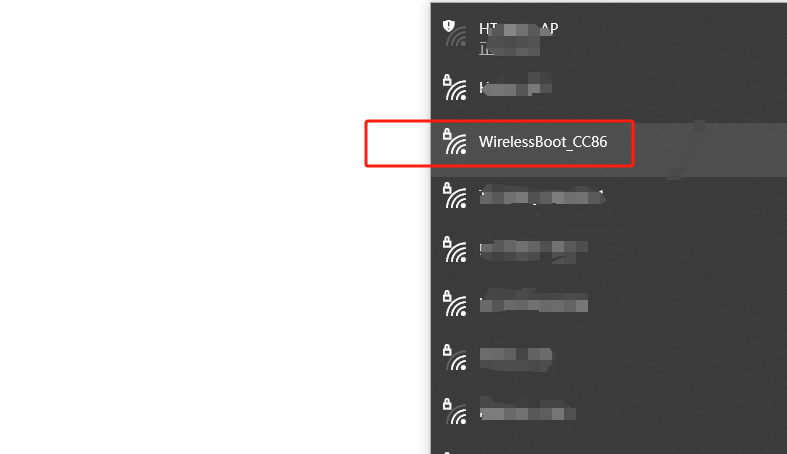
Locate the WiFi network named "WirelessBoot-xxxx" and connect to it. Default password is “heltec.org".
-
In your browser, enter "192.168.4.1" and use the default password "heltec.org".
This is the interface for uploading firmware via WirelessBoot.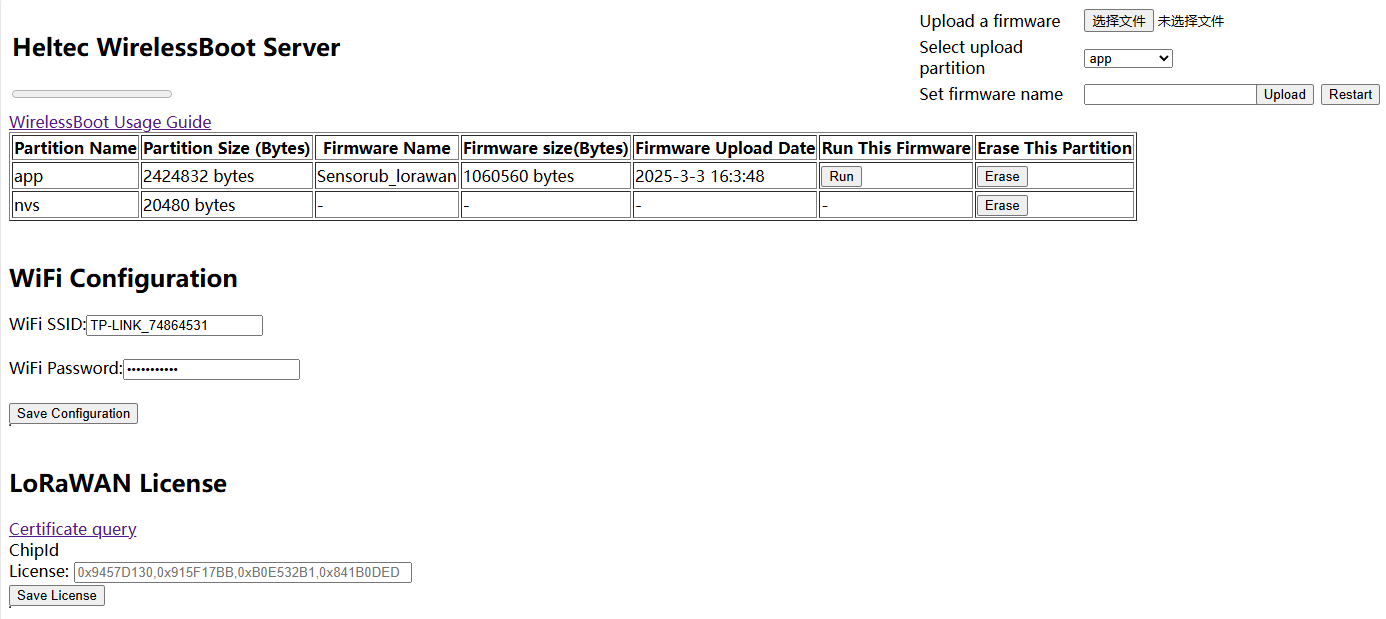
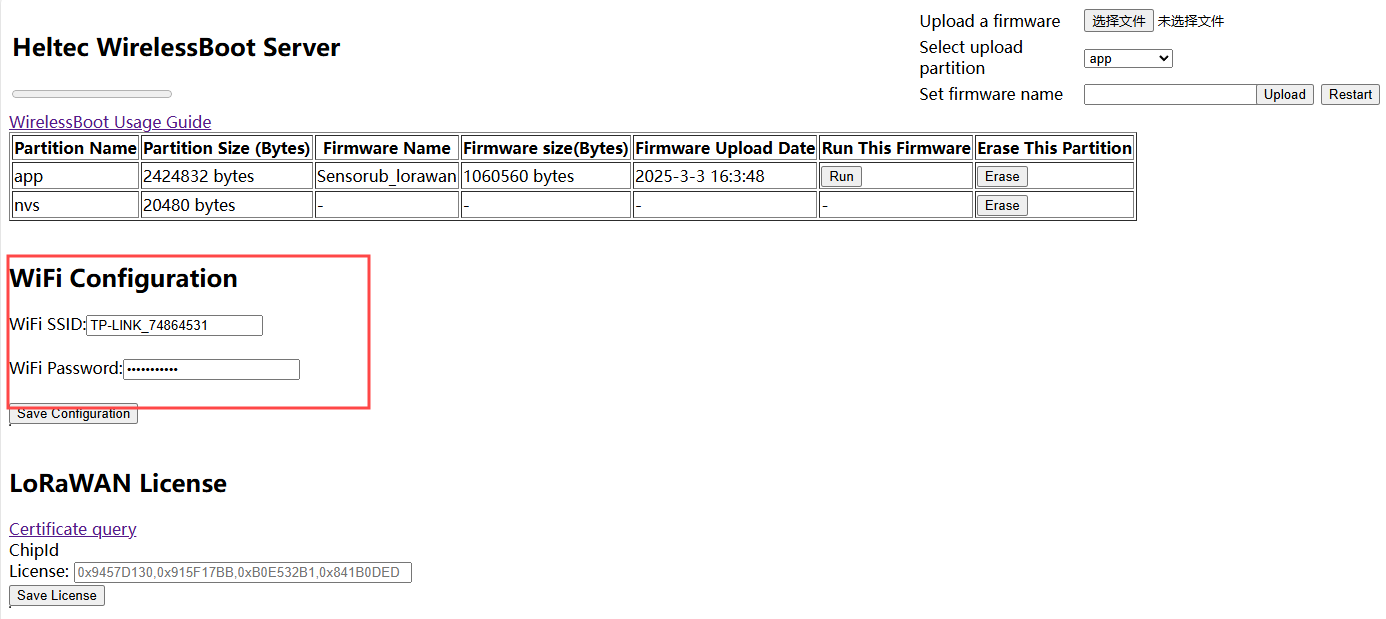
You can configure the WiFi address on this page. After "Save Configuration", you can access the WirelessBoot mode through the device's IP address without needing to connect to its WiFi.
Upload Firmware
WirelessBoot only accepts firmware in “.bin” format.
-
Navigate to the WirelessBoot page, choose the corresponding firmware,select an APP partition, and click "Upload."
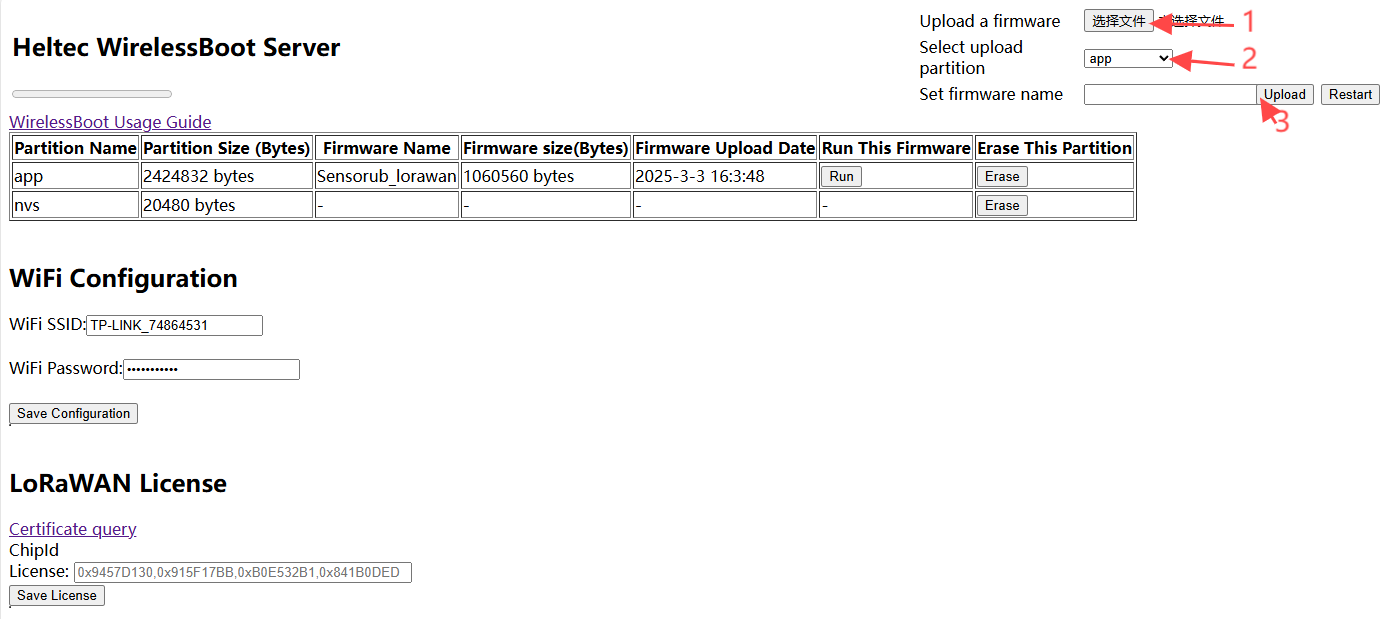
The firmware name should not be too long; otherwise, it cannot be uploaded.
-
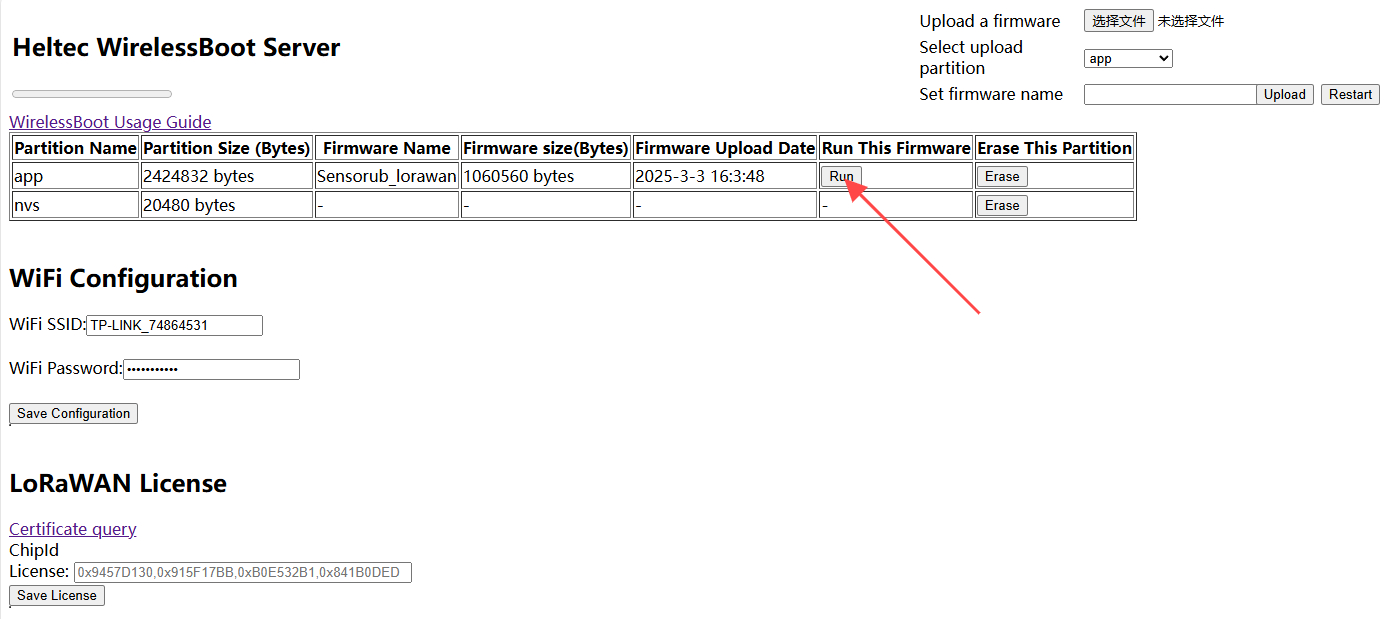
After the upload is successful, click "RUN" to confirm which program you want to execute.
-
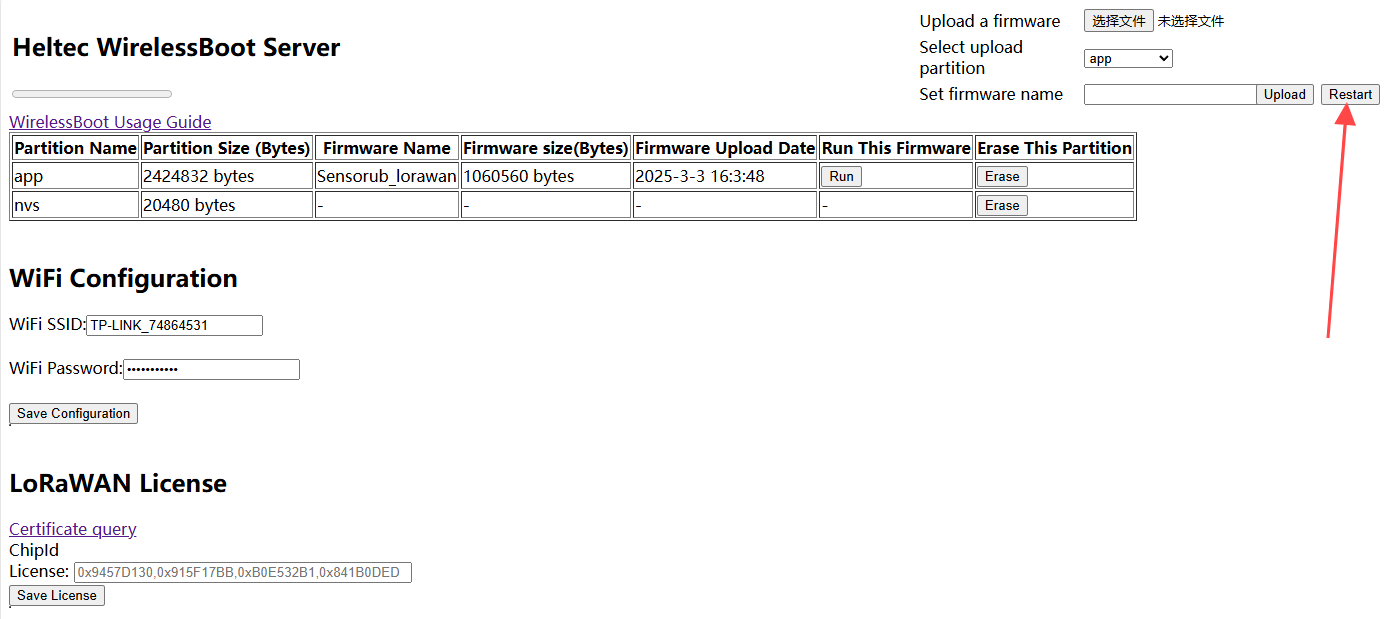
Click "Restart" to reboot the device and start its operation.
WirelessBoot Re-development
This section describes how to install and use Heltec's ESP32 WirelessBoot development framework.
If you only want to upload a pre-compiled firmware, please refer to the previous topic: Upload Firmware Via WirelessBoot.
Install WirelessBoot Framework
- Install Heltec ESP32 development environment.
If you don't know how to install, check out the Readme.MD file.
-
If you already have a development environment installed, update to the latest version.
git pull -
Switch to the WirelessBoot branch by entering the following command:
git branch --set-upstream-to=origin/WirelessBoot-Framework -
Getting branch updates
git pull
Work with Arduino IDE
-
Enable WirelessBoot on the device, the specific method depends on the product itself.
-
On the WirelessBoot page, fill in the WiFi SSID and password, then click "Save Configuration."
-
Connect your PC and device are on the same LAN.
-
Open Arduino IDE.
-
Click
Tools, select the appropriateBoardandPort.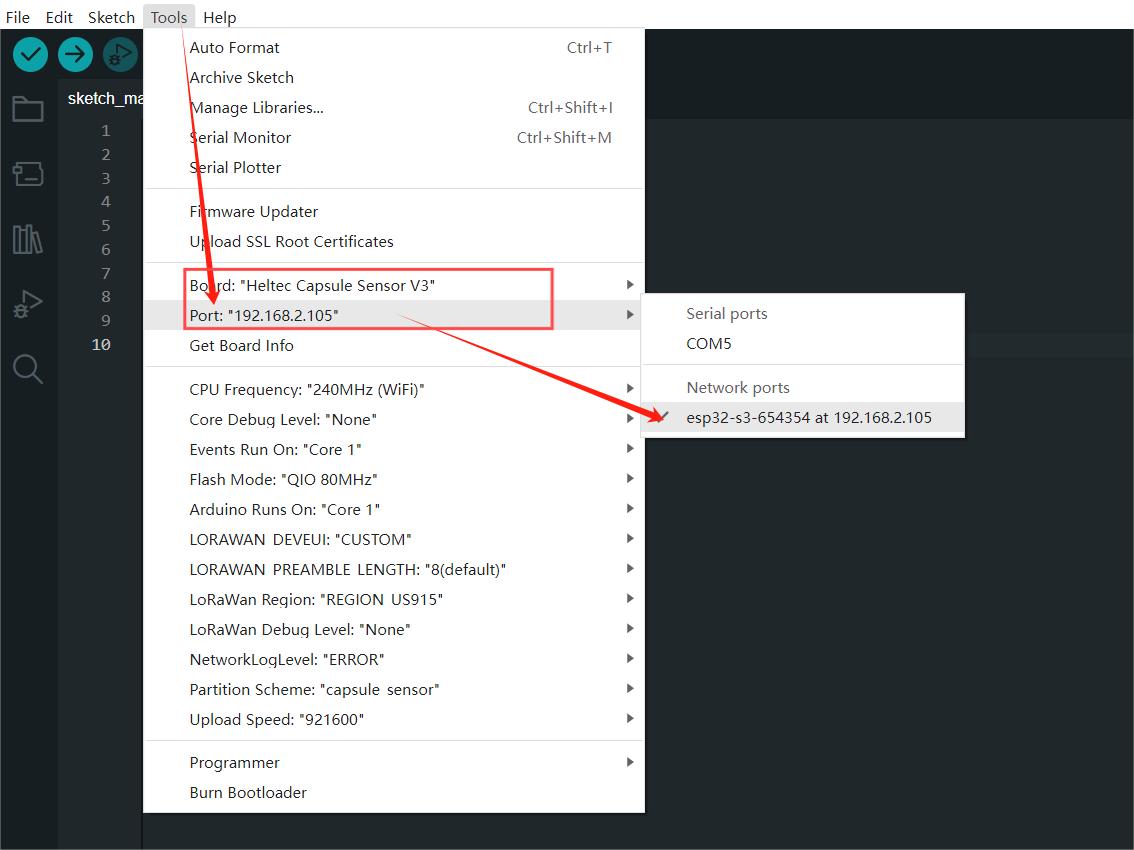
-
At this point, you can program the device through the IDE. You can choose a sample code or write your own and upload it to your device.
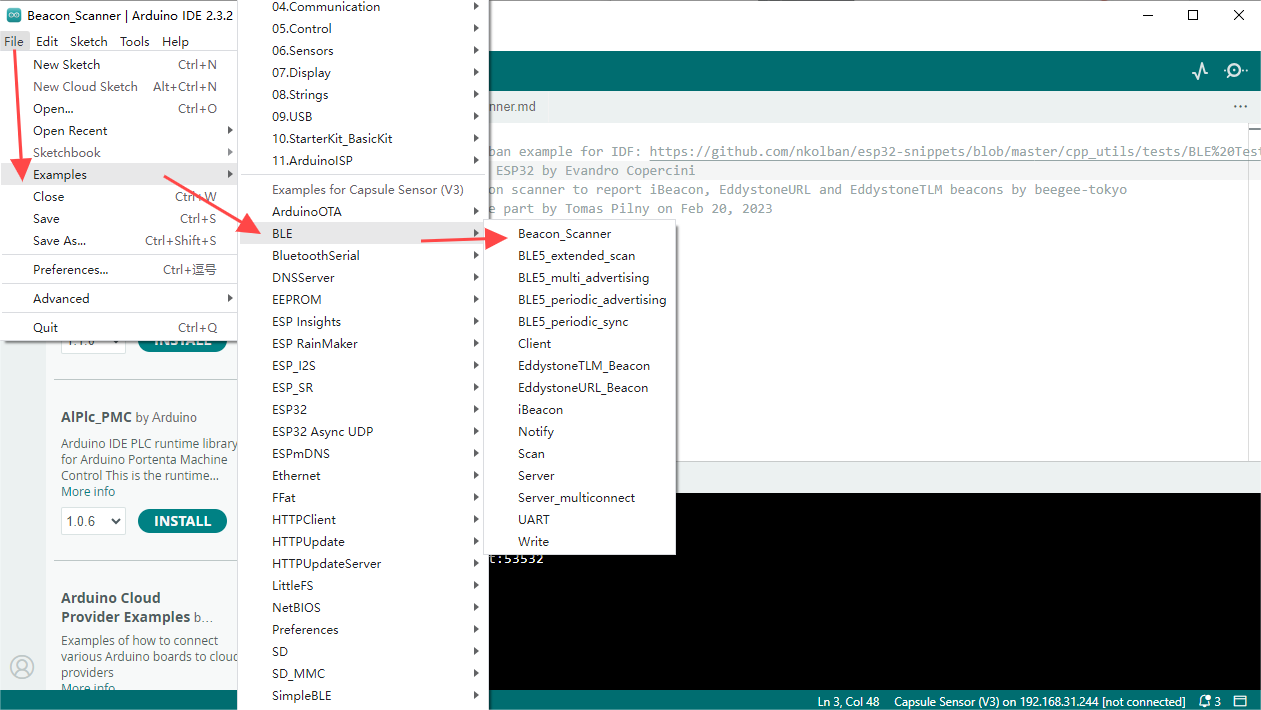
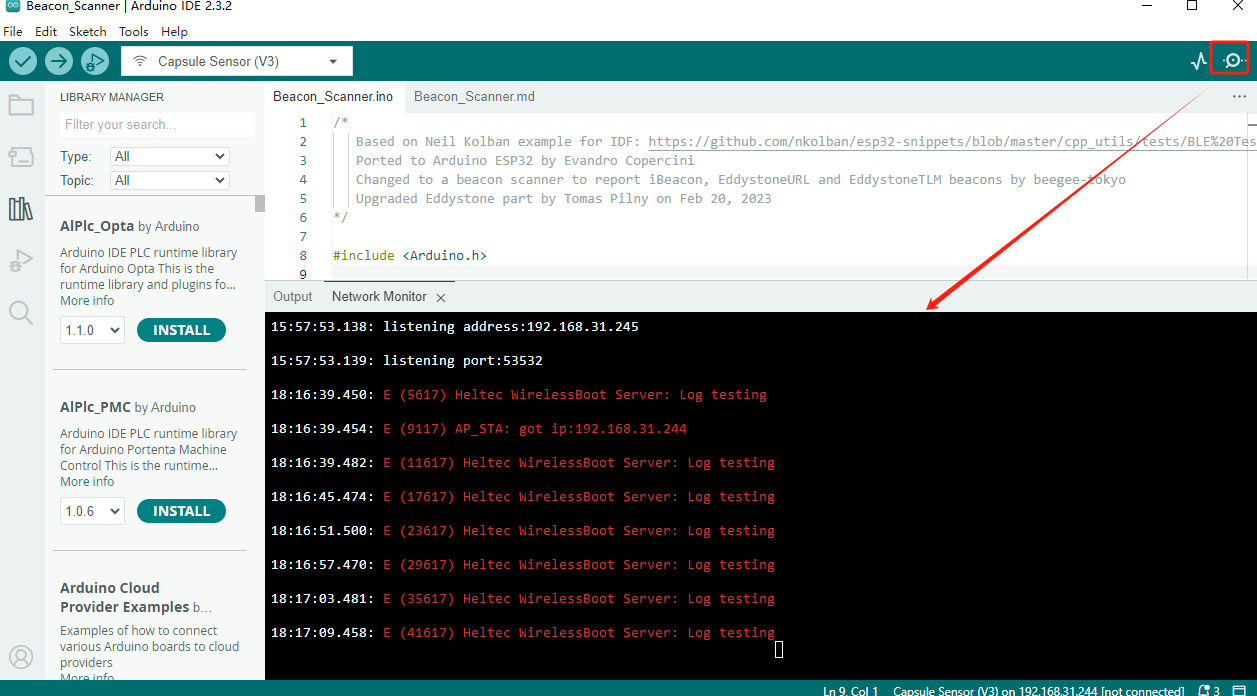
Serial ports
-
Download the serial port serial port plug-in: Heltec Esp Network Minitor
-
Access path:
C:\Users\{ueser name}\.arduinoIDE.Create a new folder calledplugins, If the folder already exists, there is no need to create a new one.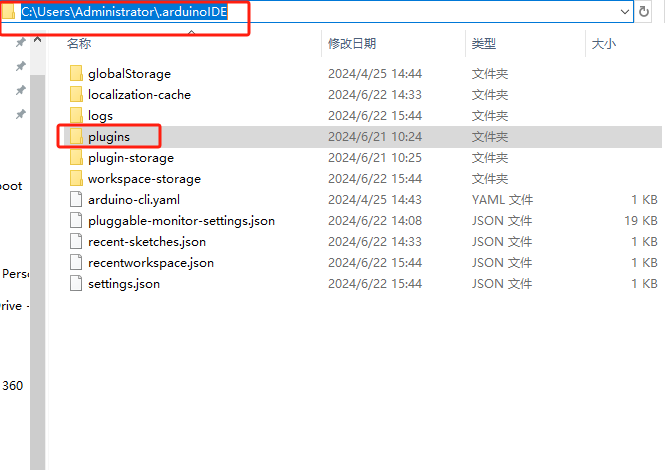
-
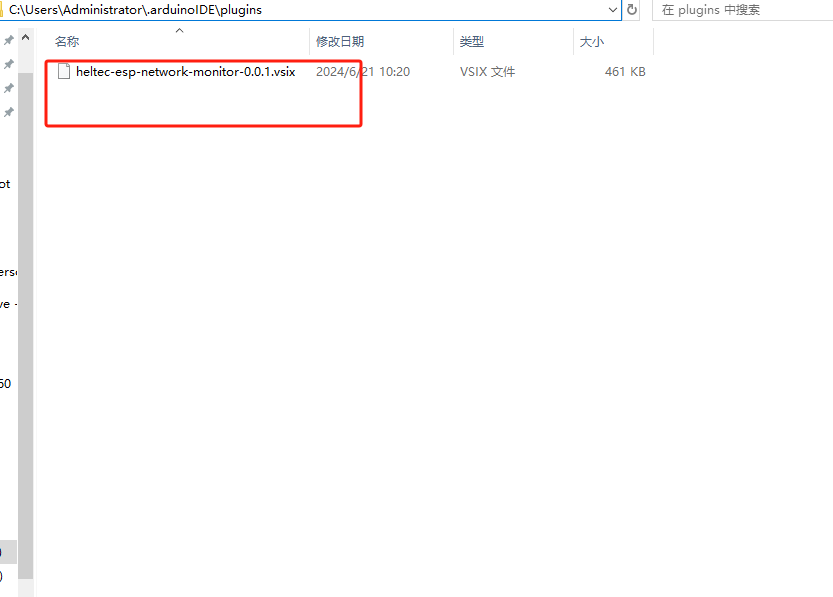
Copy the Heltec Esp Network Minitor file to the folder plugins.
-
Open Arduino IDE, Press Ctrl+Shift+P on your keyboard at the same time.
-
In the dialog box that pops up, search: Heltec Esp Network Minitor.
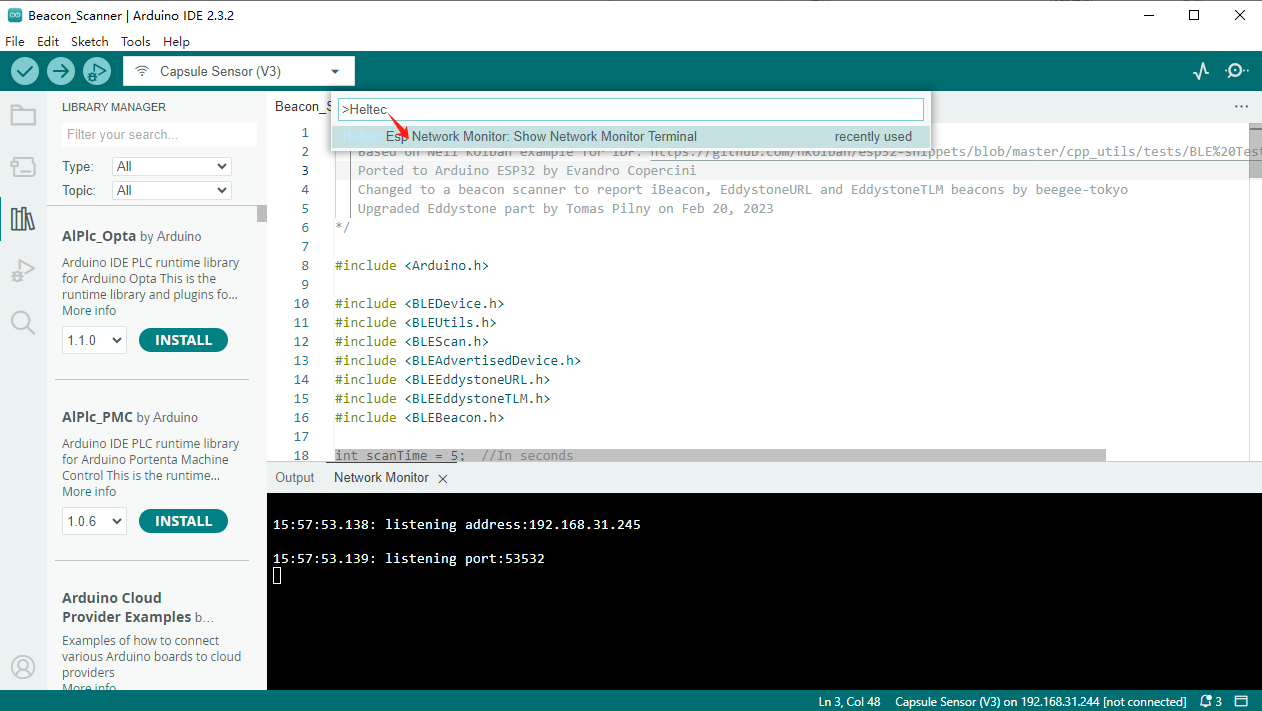
-
Click the searched plugin to enable it.
-
Open the port and connect the device's serial port to your PC via WiFi.